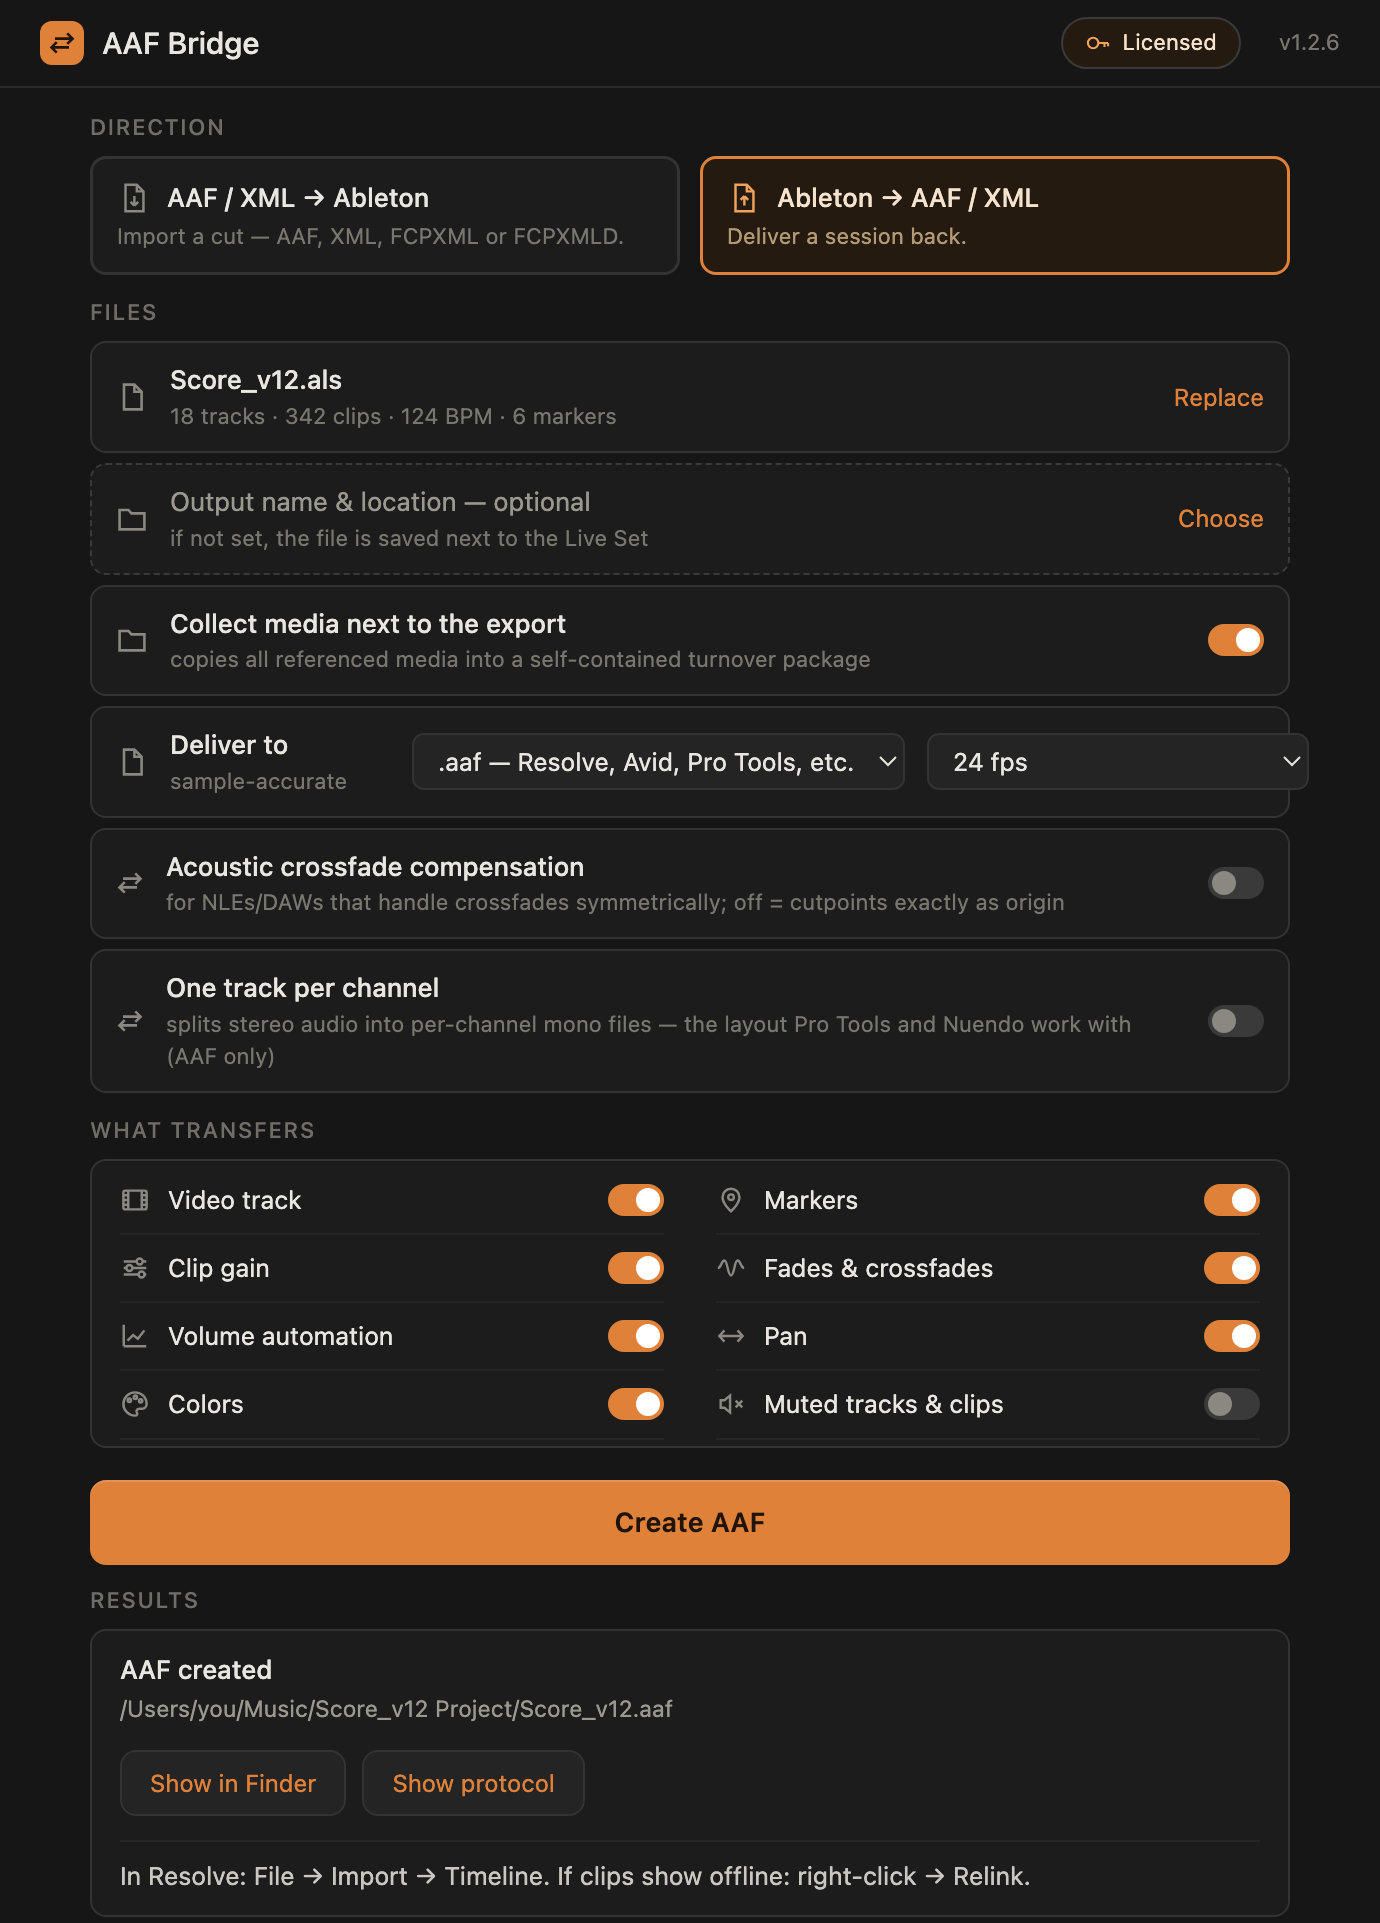
Import, AAF / XML → Ableton Live
Accepts an AAF (Resolve, Pro Tools, Media
Composer, Premiere’s own AAF export etc., the recommended, sample-accurate way in), an FCPXML / FCPXMLD
(.fcpxml / .fcpxmld bundle, Final Cut Pro) or, as a fallback, a
Premiere XML (Final Cut 7 XML, .xml; frame-quantized, prefer Premiere’s AAF
export instead). Creates a
new Ableton project folder next to the source file: the
.als, a Samples/ folder for any extracted or
converted audio, and the project marker Ableton uses. The result behaves
exactly like a session you saved from Ableton yourself.
Video: opening an AAF in Ableton Live, start to finish.
What transfers
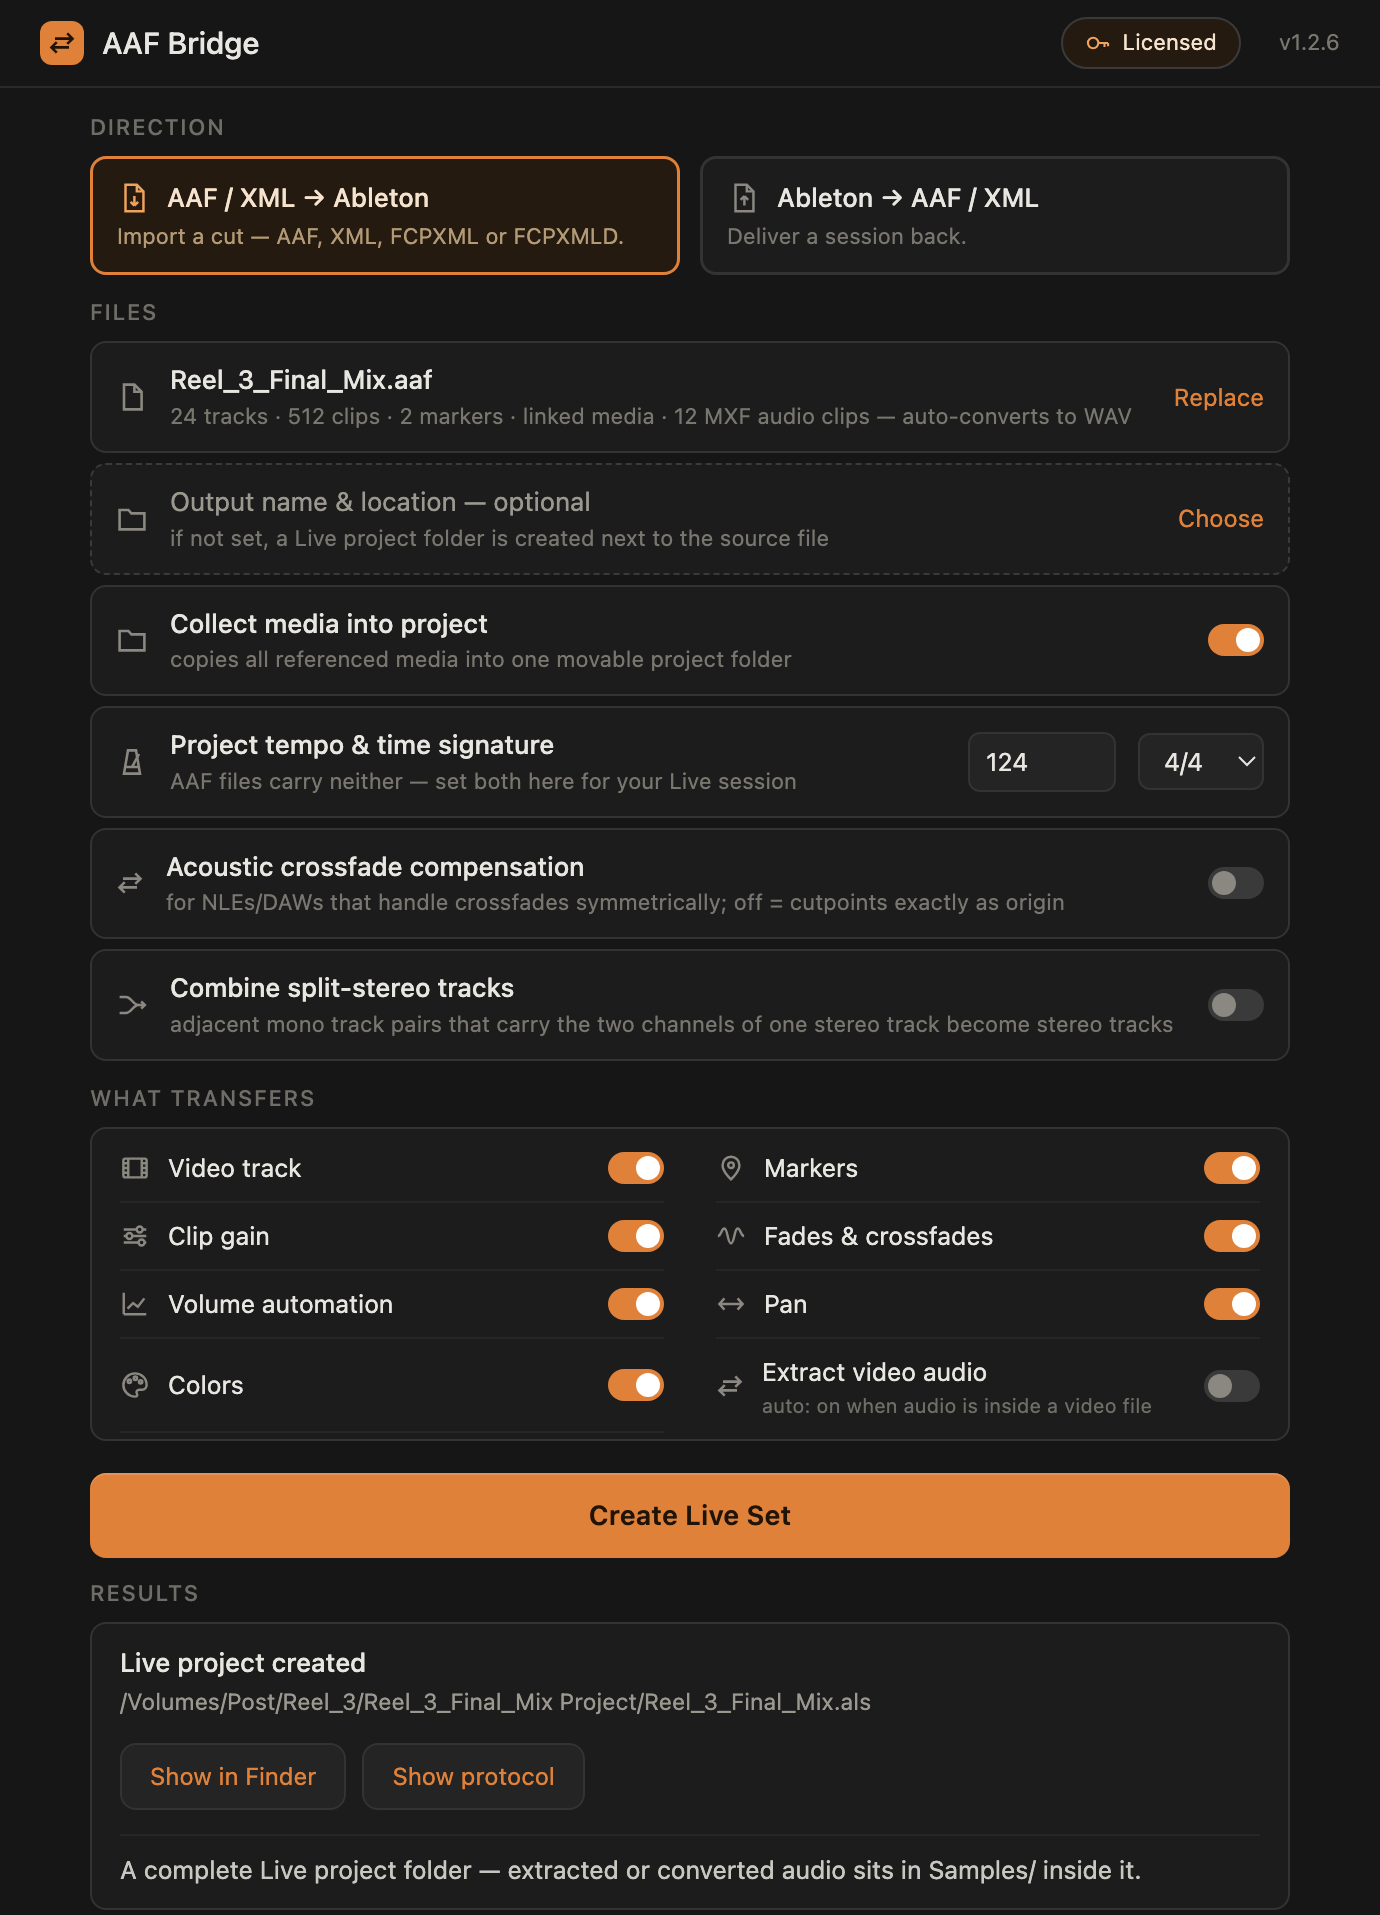
- Audio clips, position and source offset, sample-accurate.
- Track layout, track names and order.
- Clip gain, fades & crossfades, pan, volume automation, markers, track/clip colors, each switchable. Pan (static and automated) and colors exist only in AAF sources. Volume automation arrives from AAF curves, from FCPXML volume keyframes and from Premiere XML volume rides, and DaVinci Resolve doesn’t write pan or volume automation into its AAFs at all (a known Resolve limitation; Pro Tools, Nuendo etc. do).
- Crossfades in detail, they become Live-native crossfades: full blend length and no level dip. By default the edit point sits exactly where your editor or DAW cut it; an optional Acoustic crossfade compensation shifts it by half the blend instead, so Live’s waveform lines up with what you hear (for editors that place crossfades symmetrically), the crossfade transfers either way. Acoustically this is as close as Ableton can render, one nuance: Ableton blends with its own curve, so with very different material the blend character may differ slightly from your NLE’s render; positions and material stay sample-exact, and a round trip restores the original transition precisely.
- Video reference track, the picture cut comes in on its own video track, so Ableton’s video window follows the edit while you mix to image.
Combine split-stereo tracks (AAF → Ableton)
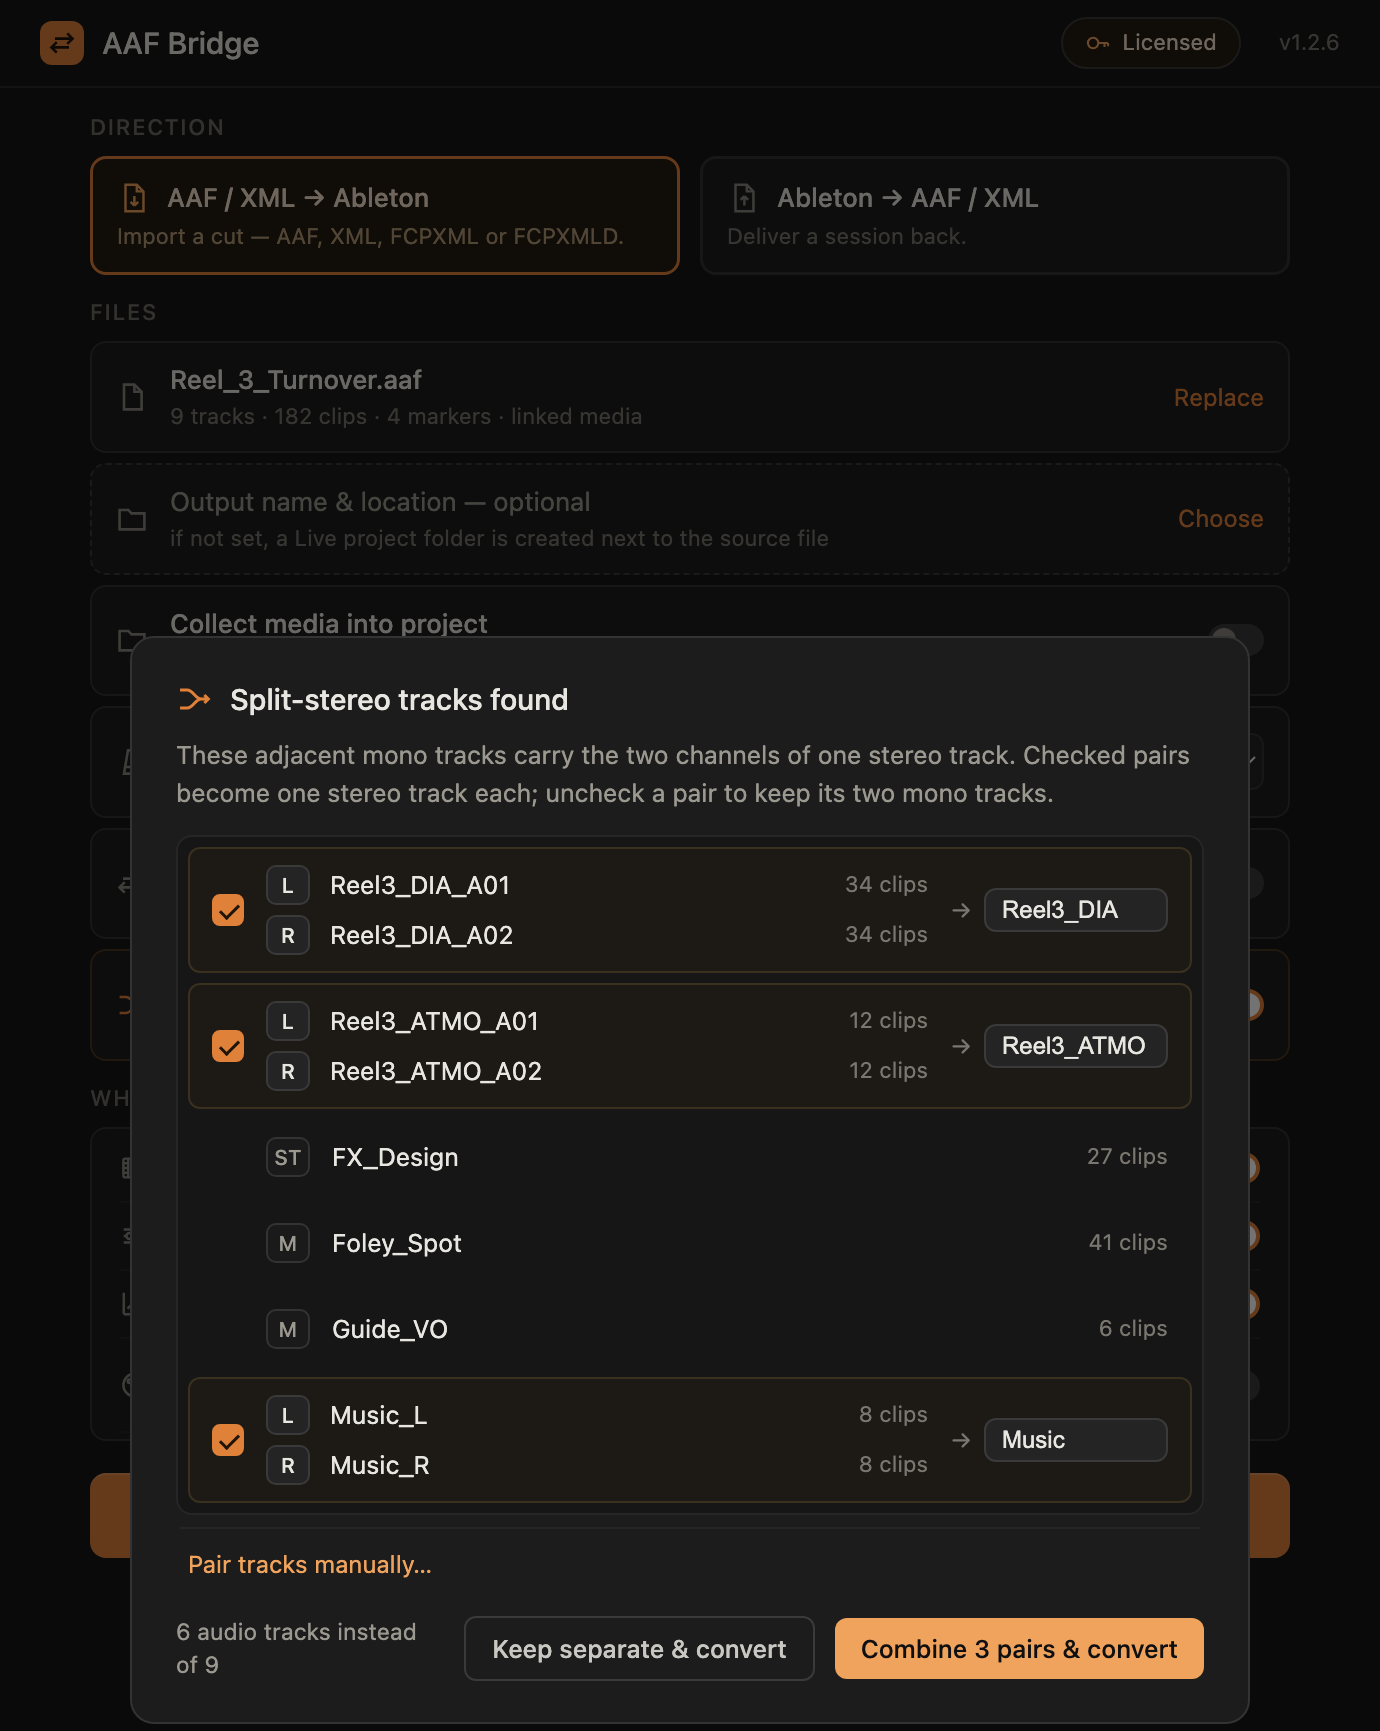
Some editors export stereo tracks as two mono tracks, either by default or as an option. Nuendo, Cubase and Pro Tools, for example, write two identically named neighbour tracks for left and right. AAF Bridge detects these pairs when you load an AAF and combines them back into stereo tracks.
The Combine split-stereo tracks toggle turns itself on when pairs are found, and a review window opens before converting: it lists every pair, lets you uncheck any of them, rename the combined track, or pair two tracks manually if a split wasn’t detected automatically. Each combined clip becomes one interleaved stereo file at the original sample rate and bit depth.
Tips
- Set tempo and time signature before converting. AAF files carry neither, so enter them for your Ableton session; otherwise the Set opens at 120 BPM / 4·4.
- MXF audio is handled automatically. Resolve
often wraps audio in MXF containers, which Ableton cannot read. AAF
Bridge converts them to WAV on the fly (into
Samples/Converted/), nothing to install. - Extract video audio (a switch, off by
default), only needed when a clip takes its sound directly from
a video file (
.mov/.mp4). Turned on, that audio is decoded to a video-free WAV so Ableton shows one clean, continuous picture instead of the movie’s frames cutting at every audio edit. Most footage delivers audio and video separately, leave it off then. - Collect media into project makes the folder
fully self-contained: every referenced file is copied into
Samples/, so the project can be moved or archived as one folder. - Keep the project folder together. Ableton
resolves audio relative to the
.alsfirst; if you move only the.als, clips may show offline.
Limitations
- No devices or mixer settings. The new session is intentionally “bare”, AAF carries no plugins, EQ or effects. Ableton re-analyses the audio on first open.
- Pan only appears if the source app wrote it. DaVinci Resolve does not export pan, a known Resolve limitation. Nuendo and Pro Tools AAFs carry it.
- Volume automation depends on the source. Resolve has a known bug and does not write volume automation to AAF; Pro Tools and others do.
- Referenced (not embedded) audio must stay
reachable at its path, unless you use Collect
media. Clips whose audio lives inside a video file
(
.mp4/.mov) load in Ableton, but that video file must remain reachable. - XML imports carry less than AAF. Premiere XML and FCPXML always link their media (no embedded audio), and neither carries track/clip colors. MXF audio still auto-converts, and Collect media still works. If the source app can write AAF, prefer it.
- Ableton Live version: sessions open in Live 11 and 12. They do not open in Live 10 or earlier (Ableton changed the session format).